Workflow LibraryLevels, Walls & Floors
Set Up Levels and Floor Plans
Levels set up with matching floor plans for every storey.
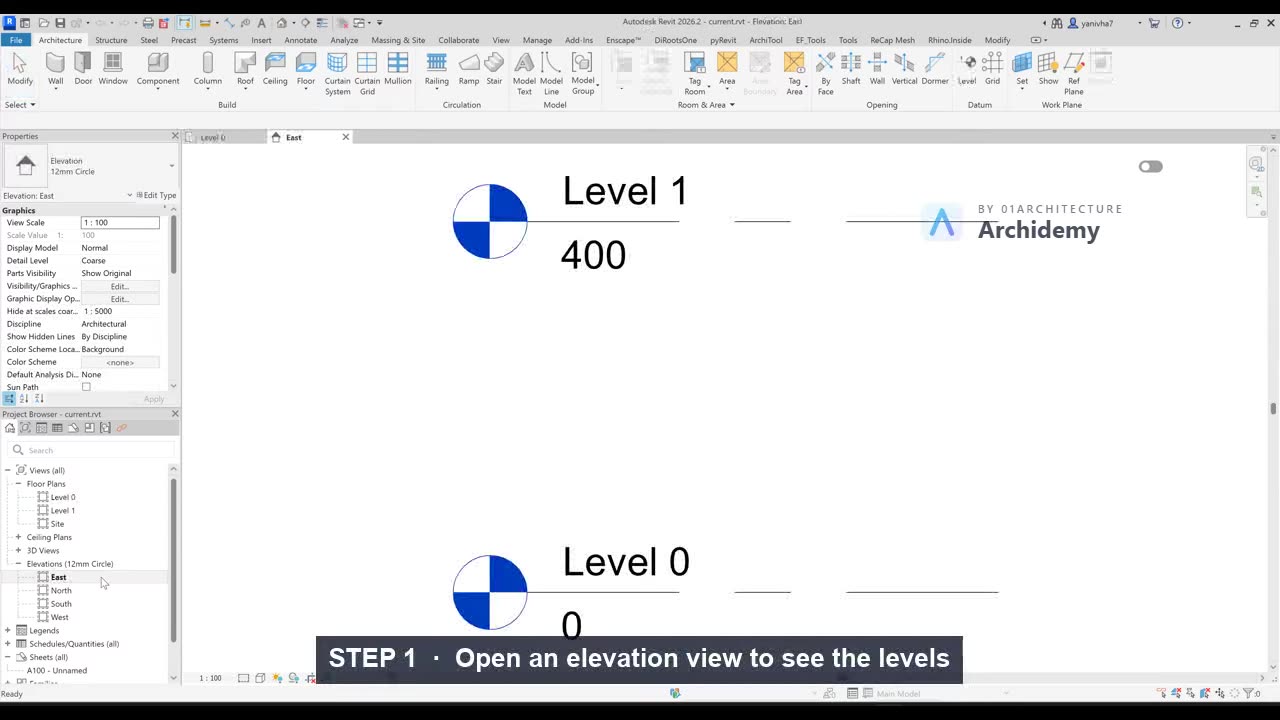
The recorded clip is for signed-in members. The written steps are below.
Sign in to watch- Open Revit and start a new project using a metric template.
- Go to an Elevation view (e.g. East, West, etc.) from the Project Browser.
- Review existing Levels:
- Example:
Level 0,Level 1.
- Example:
- To create additional Levels:
- On the Architecture tab, click Level.
- Draw new horizontal Level lines at the desired heights.
- Rename Levels and set heights:
- Click the Level name (e.g.
Level 1) to rename. - Edit the elevation value directly in the dimension or in Properties.
- Click the Level name (e.g.
- Generate corresponding Floor Plans from Levels if they do not exist:
- Go to View → Plan Views → Floor Plan.
- In the dialog, tick the Levels that should have floor plans.
- Click OK – Floor Plan views are created and the Level markers turn blue to indicate they have views.
Notes
- A Level represents the 0.00 finish floor for that storey.
- Floor plans are simply views that are offset from those Levels.
Taught in
- BIM + Computational Workflow · 2023 — original class recording lives there.
Was this lesson helpful?