Workflow LibrarySheets, Annotation & Publishing
Annotate a Plan with Dimensions, Text, and Tags
A ground-floor plan carrying a dimension string, a text note, and door/window tags that read data straight from the model.
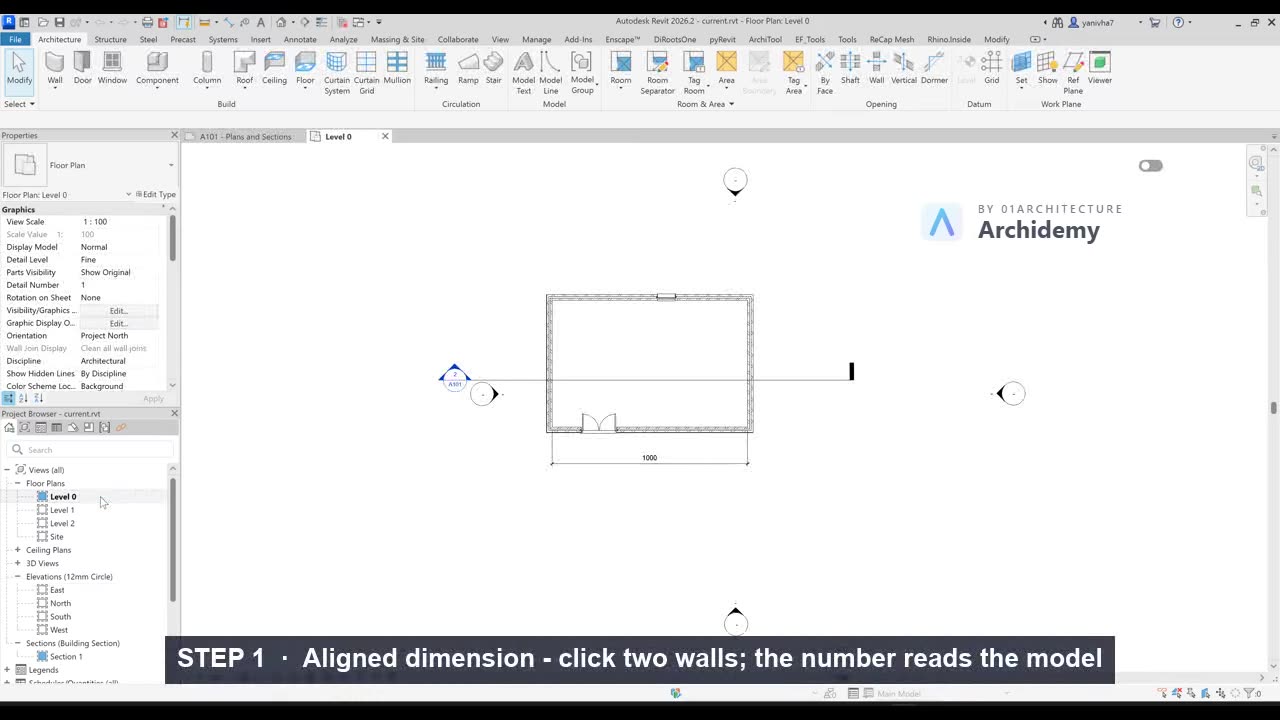
The recorded clip is for signed-in members. The written steps are below.
Sign in to watch- Open Floor Plans → Level 1. Annotation is placed in a view, so pick the view you actually want to print from.
- Add an aligned dimension: type DI (or Annotate → Aligned Dimension).
- In the Options Bar, leave the reference on Wall centerlines for now (you can switch to Wall faces later).
- Dimension a single wall:
- Click the first wall, then click a parallel wall.
- Move the mouse away from the building and click empty space to place the dimension string.
- Dimension a whole wall chain in one string:
- Still in DI, click each wall (or opening edge) along one side of the building, one after another — each click adds a witness line.
- Click in empty space to place the entire running string, then press Esc twice.
- Hover and press Tab if Revit highlights the wrong reference — Tab cycles between face, centerline, and edge.
- Add a text note:
- Go to Annotate → Text (shortcut TX).
- In the ribbon, pick a leader option (e.g. one-segment leader) if you want an arrow pointing at something.
- Click where the arrow should point, click again for the text position, and type your note (e.g.
Entrance). Press Esc twice when done.
- Tag a door and a window:
- Place a door first if you have none: Architecture → Door (DR), click on a wall, Esc.
- Go to Annotate → Tag by Category (shortcut TG).
- Hover over the door — a tag preview appears showing its Mark number — and click to place it. Do the same for a window.
- If Revit says no tag is loaded, click Yes to load one from the library (Annotations folder).
- Now open the 3D view or another plan: none of your dimensions, text, or tags are there. Annotation is view-specific — it belongs to the view, not the model.
- Try to type a different number into a dimension: Revit refuses, because a dimension reports the model. To change the number, move the wall.
Note: Tags are not dumb text — a door tag displays the door's Mark parameter, so renumbering the door in its Properties updates the tag (and later the schedule) everywhere; annotation lies only if you write it as text.
Taught in
- New for 2026 — first taught in BIM + Computational Workflow 2026.
Was this lesson helpful?