Workflow LibrarySetup & Coordinates
Start a New Revit Project and Set Units
A fresh Revit project with the right template, units and save habits.
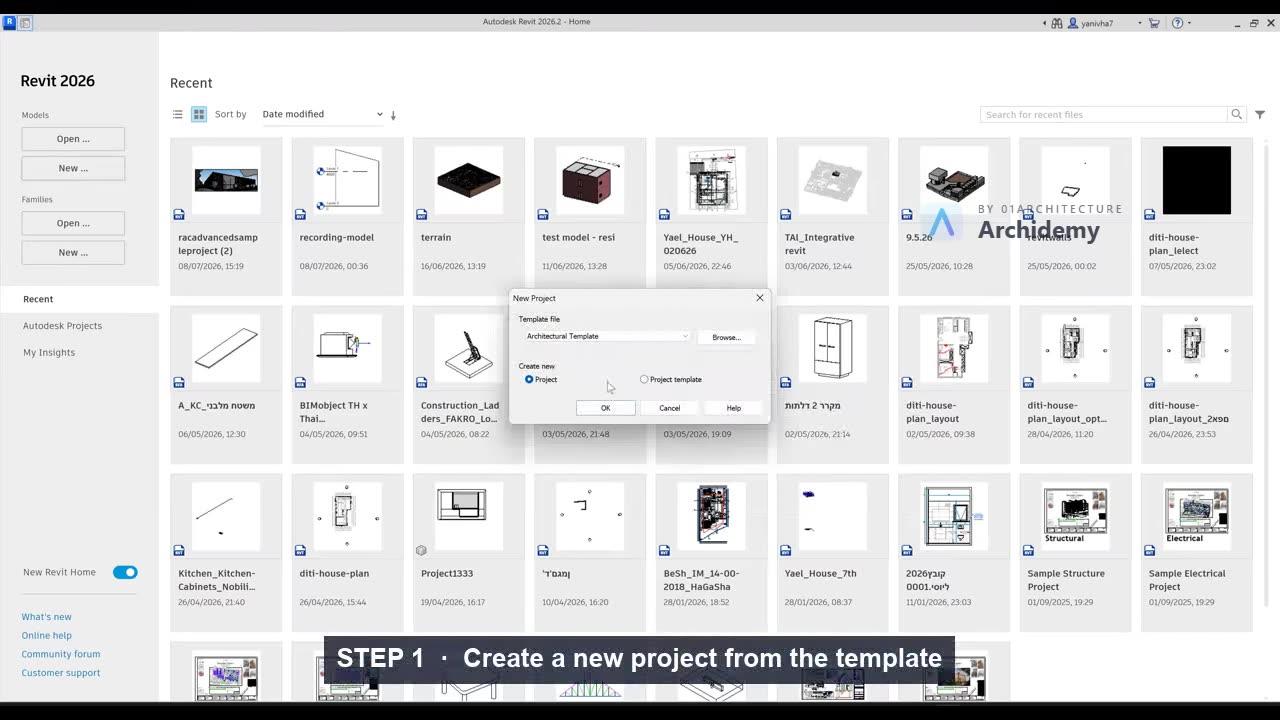
The recorded clip is for signed-in members. The written steps are below.
Sign in to watch- Open Revit and go to the Home screen.
- Click New under the Projects section.
- In the Template list:
- Prefer Architectural Template if available.
- If not available, choose Metric.
- Choose Project under Create New and click OK.
- After the project opens, set your project units:
- Go to Manage → Project Units.
- For Area, choose Square Meters (or as required).
- For Length / Distance, pick the unit your office or school standard uses:
- Millimeters — the usual choice for construction documentation.
- Centimeters — used by some regional standards.
- Meters — for site and urban-scale work.
- Make sure both Length and Dimensions use the same unit system you prefer.
- Click OK to confirm.
Tip: In this workflow, you are only changing representation, not the actual model scale. Revit always models at real-world size (1:1).
Taught in
- BIM + Computational Workflow · 2023 — original class recording lives there.
Was this lesson helpful?