Workflow LibraryGroups, Schedules, Rooms & Areas
Place Rooms and Tags That Report Name, Number, and Area
Every enclosed space in the plan carries a named, numbered Room whose tag shows its computed area.
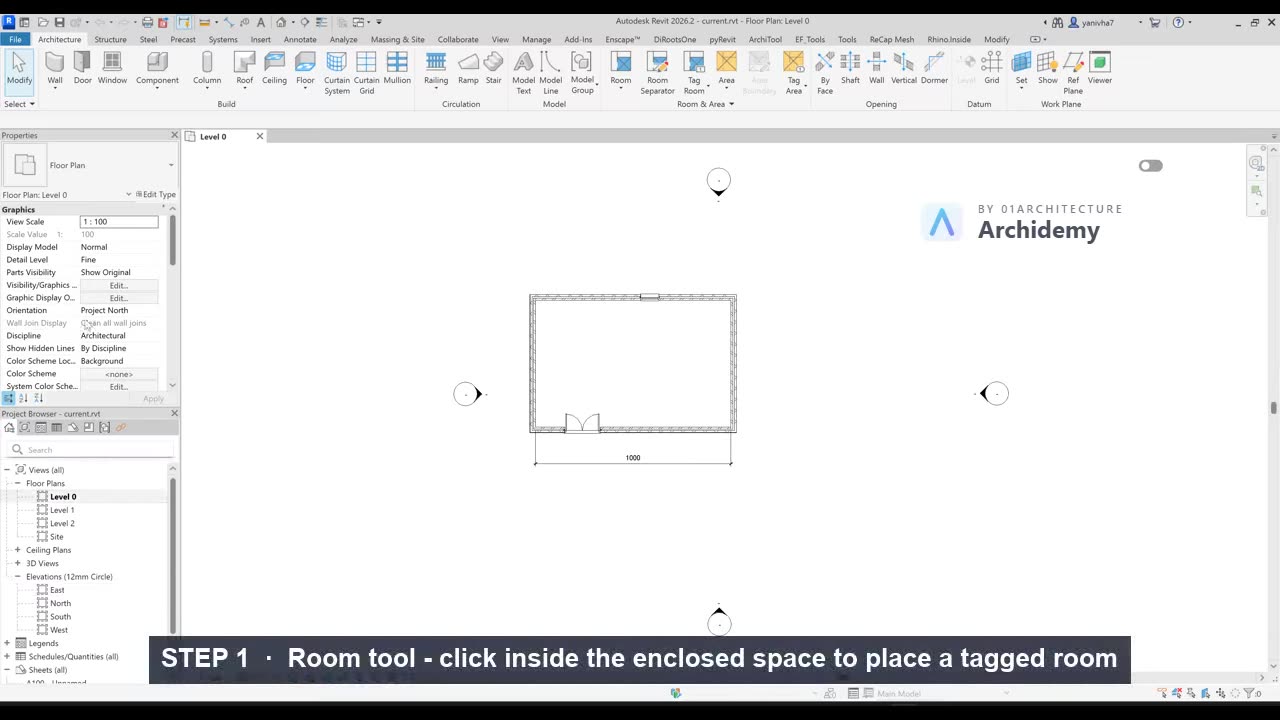
The recorded clip is for signed-in members. The written steps are below.
Sign in to watch- Open Floor Plans → Level 1. Rooms are placed in plan views.
- Start the Room tool: Architecture → Room (shortcut RM).
- In the ribbon, make sure Tag on Placement is highlighted so each room gets a tag automatically.
- Move the cursor inside an enclosed space — Revit previews the room with a blue X filling the boundary it detected.
- Click once inside each enclosed space to place a room. Press Esc twice when done.
- Name and number the rooms:
- Click a room tag's text (click once to select, once more to edit).
- Type the real name over
Room(e.g.Studio) and the number over1(e.g.101) — this edits the Room element itself, not just the tag.
- Make the tags show area:
- Select a room tag.
- In the Type Selector, switch it to a type with area, e.g. Room Tag: Room Tag With Area — the tag now reports the computed m².
- If that type isn't in the list, load it: Insert → Load Family → Annotations → Architectural → Room Tag.rfa, then pick the With Area type.
- Fix a "Room is not in a properly enclosed region" warning:
- Click the warning (or find the offending room — its area reads Not Enclosed).
- Look for the gap: an unjoined wall corner, a missing wall, or a wall whose Room Bounding property is unchecked.
- Either close the gap with the wall's drag grips, or draw a Room Separator line across an intentional opening: Architecture → Room → Room Separator, then sketch across the gap.
- Delete-test: select a room and press Delete — Revit warns the room is removed from the view but stays in the project. Use Architecture → Room and pick it from the Room dropdown in the Options Bar to place it again, or delete it for good from a room schedule.
- Check yourself in 3D or by moving a wall in plan: room areas update automatically because the room reads its bounding walls.
Note: The Room is a real model element — its name, number, and area are data that every tag, schedule, and area calculation reads from the same place, which is why you never write a room name as plain text.
Taught in
- New for 2026 — first taught in BIM + Computational Workflow 2026.
Was this lesson helpful?
Model an In-Place Family (Only When You Should)
One-off, context-bound geometry that still schedules, tags, and cuts correctly — and a clear rule for when to build a loadable family instead.
Build a Door Schedule That Fills Itself In
A live door schedule — Mark, Type, Width, Height, Level — sorted by level and placed on your sheet.